Creating a database cluster
On the Clusters view, select the Create New button to create a new cluster. You can choose from a database cluster or a Lakehouse analytics cluster. In this quickstart, you are going to create a database cluster, so select the "Database Cluster" option.
When you select to create a database cluster, you'll move on to the Create Cluster page. As you were already in a Project's Cluster view, the created cluster shall become be a resource in that project.

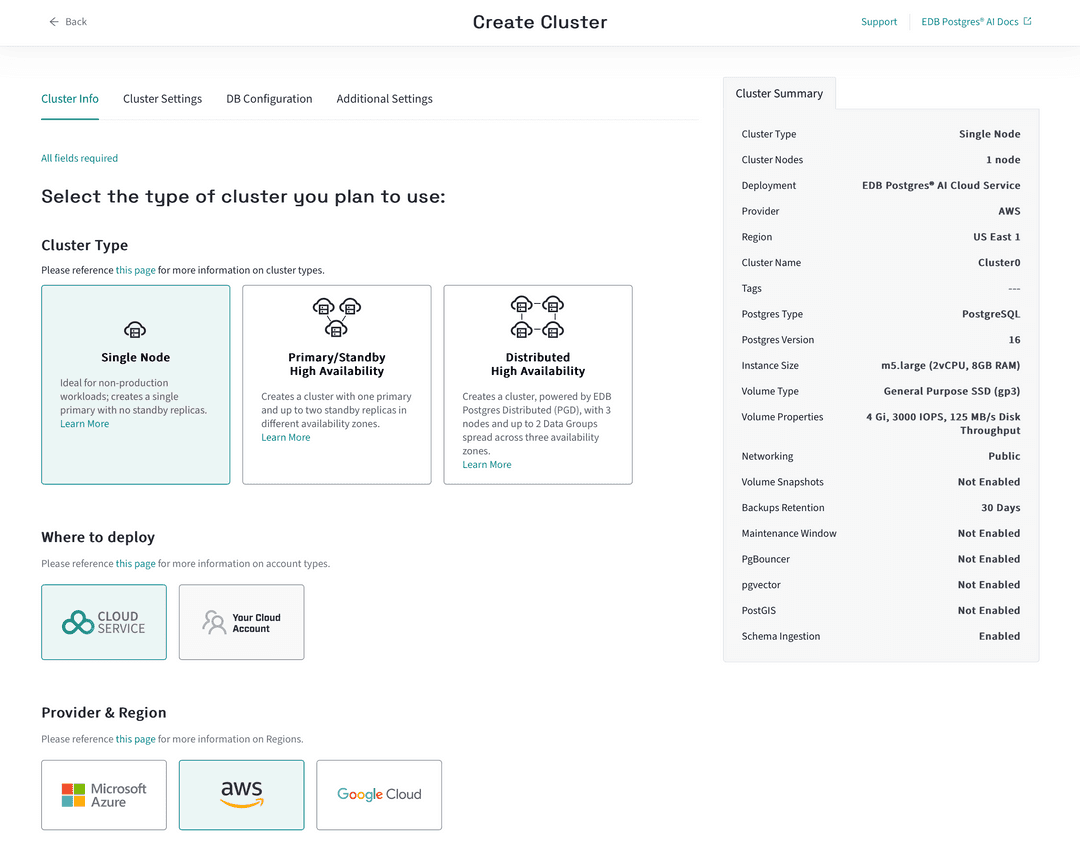
You now have the choice of what type of database cluster you want to create. You can choose between a single node or a multi-node cluster. You're going to create a single node cluster, so select that option.
Next, you need to choose whether you want the cluster to be hosted and billed by EDB Postgres AI Cloud Service, or if you want to host the infrastructure yourself in your own cloud account, while retaining the benefits of EDB Postgres AI management and monitoring of the cluster.
Hosting with Cloud Service is quick and doesn't require any setup on your part, so that's the option to choose for this quickstart.
The next step is choosing the cloud provider and region you want to use. You can choose from AWS, Azure, or GCP. EDB's Hosted Cloud Service supports them all. Choose AWS for this quickstart and the whichever region you prefer.
At the bottom on the page is a button marked Next: Cluster Settings. Select that to move to the next step. Do not press the Create Cluster button yet; if you do you'll create the cluster with the default name Cluster0. The next page allows you to customize the cluster settings, including the cluster name.

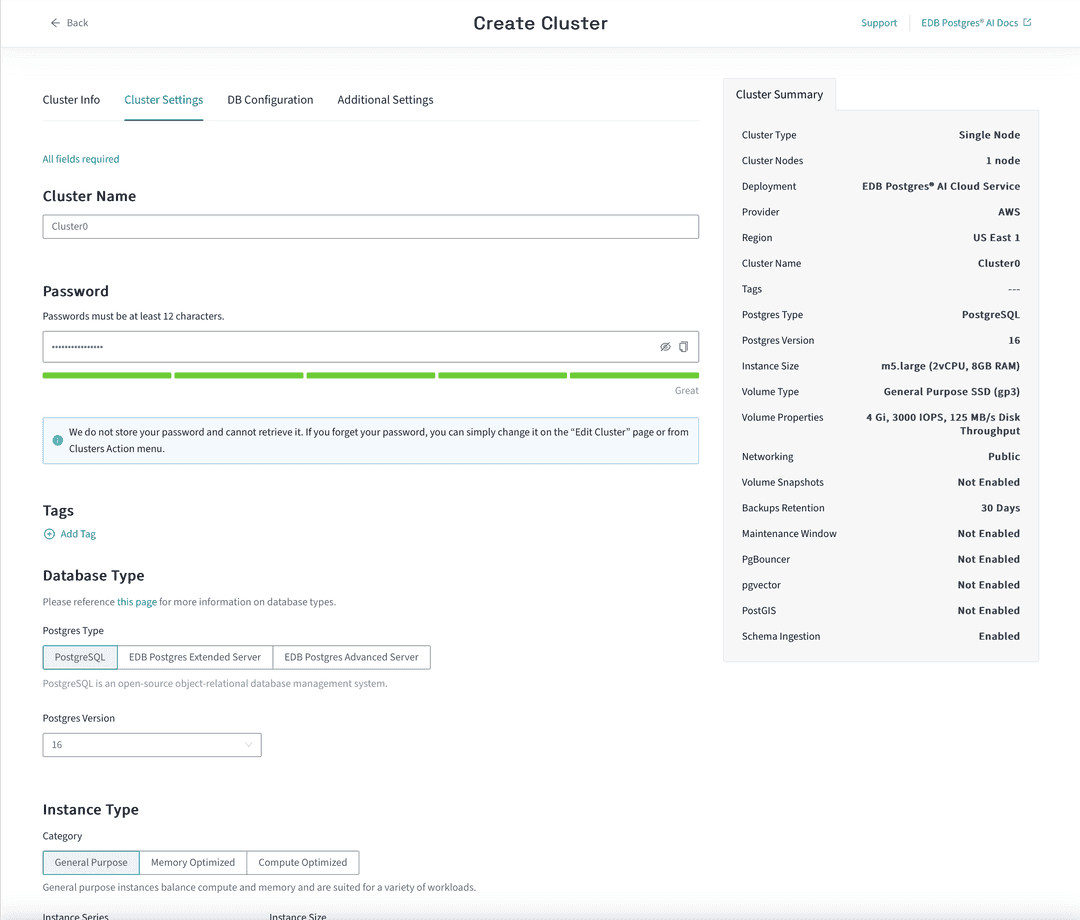
Give the cluster a name in the top field marked Cluster Name. You're going to call your new cluster Demo Cluster.
The next field is Password and is already filled in with a generated password. It's essential that you copy this password to a safe place or enter a password that you know. You'll need this password to connect to the database cluster later.
Below the password field is a Tags field. Tags are a way to label your resources so you can find them later. You can add tags to your cluster if you want, but it's not required.
Below that's the Database Type section with a selector for which kind of Postgres database your want; plain Postgres, EDB's Postgres Extended or EDB's Postgres Advanced (with optional Oracle compatibility). You're going to use plain Postgres for this quickstart, so select Postgres
Progressing further down the page are settings for instance type for the machine which will be running the database, storage size and performance, network logs and allowlists. You can leave all of these at their default settings for this quickstart.
Now you can press the Create Cluster button. Cloud Service is now provisioning the cluster and you'll automatically go to the Project's Clusters view to watch its progress.

It can take anything from a few minutes to 15 minutes to create the cluster, depending on the database type, cloud provider and region you chose.
Installing a Postgres client
While the cluster is provisioning, you should install a Postgres client on your local machine; you are going to need it for the next step. You can use any Postgres client you like, but we recommend using psql as it's a simple command line client that you will always want to hand. You can install psql using your operating system's package manager. For example, on Ubuntu you can install it with the command:
sudo apt-get install postgresql-client
On macOS, you can install it using Homebrew with the command:
brew install libpqOn Windows users can download the Postgresql from the EDB site and only install the client.
Next steps
When the provisioning has completed, you can move on to connecting to the database cluster.
- On this page
- Next steps
Could this page be better? Report a problem or suggest an addition!