Performing a schema migration v4
After resolving errors in your schemas, you can migrate the schemas to an EDB Postgres Advanced Server database.
The Migration Portal provides guided steps for migrating your schemas using one of the following target database options:
- Offline migration - download a data definition language (DDL) SQL file to create the schema manually in a target EDB Postgres Advanced Server database using a client application such as the psql client or pgAdmin. This option is suitable for both on-premises and cloud based migrations.
- Online migration - connect directly to a target EDB Postgres Advanced Server database and automatically create the schema in it. Generally, this option is most suitable for migrations to databases running in the cloud (either BigAnimal clusters or self-managed instances).
Before migrating a schema, EDB recommends that you identify any configuration requirements for the target database in Known issues, limitations, and notes.
Offline migration
Migrate schemas manually to an EDB Postgres Advanced Server on Windows or Linux platforms by running a DDL SQL file using a client.
In the Projects view, select Migrate to....
Select Offline Migration and Next.
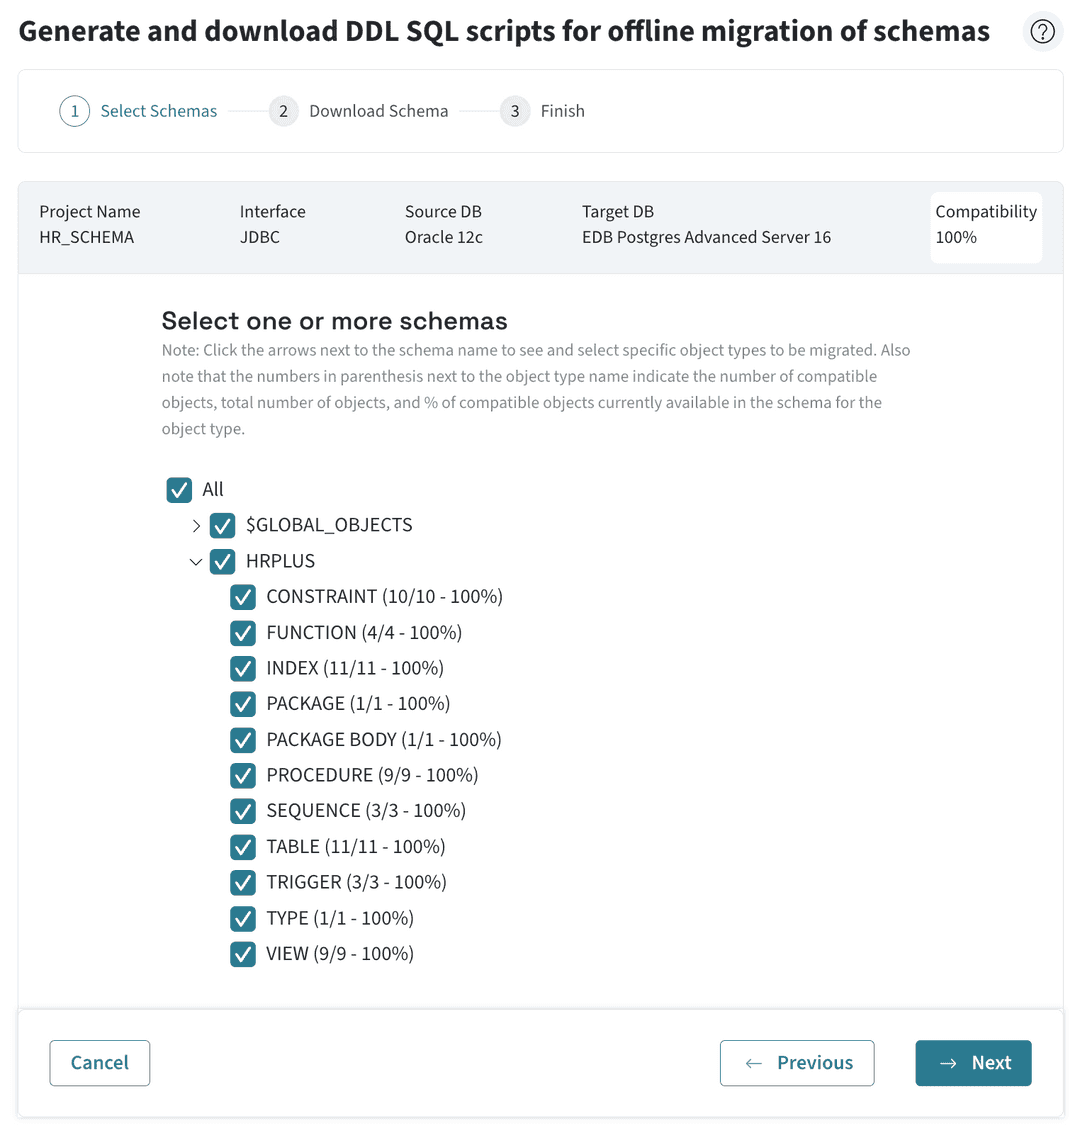
Select one or more schemas to migrate to EDB Postgres Advanced Server. You can also expand a schema and select specific object types under each schema.

Note
If your schemas aren't 100% compatible, a banner appears. Complete the Contact Us form as needed.
Select Download SQL file, to download the assessed schema. The zip package consists of SQL files with DDLs for your selected schemas and objects. The DDLs are grouped in SQL files by project, schemas, or objects.
File name Description Example <ProjectName> _ALL_OBJECTS.sql A single consolidated file consisting of DDLs for all your selected schemas and objects. AllTestMigration_ALL_OBJECTS.sql consists of DDLs for all objects of schemas OE, SH, IX, and PM, and only selected objects of schema HR. <SchemaName> .sql One or more files, each consisting of DDLs for selected objects in a particular schema. HR.sql consists of DDLs for all the selected objects of the HR schema. <SchemaName> _ <ObjectType> .sql One or more files, each consisting of DDLs for a single selected object. HR_TABLE.sql consists of DDLs only for TABLE object of the HR schema. After the zip file finishes downloading, select Done to return to the main Migration Portal page.
Import the schema into your target database:
Use the edb psql command line utility to connect to the EDB Postgres Advanced Server database from where the converted schema is to be migrated.
Create a new database:
CREATE DATABASE <database_name>;
Connect to the new database using the following psql command:
\connect <database_name>
Import the required SQL files into the new database using the following psql command:
\i <path_to_exported_schema_file>.sql
Note
You can alternatively use the
pgAdminclient for the import. Import the schema into your target database:
Online migration
Directly connect to and create schemas in the target EDB Postgres Advanced Server database.
In the Projects view, select Migrate to....
Select Online Migration and Next.
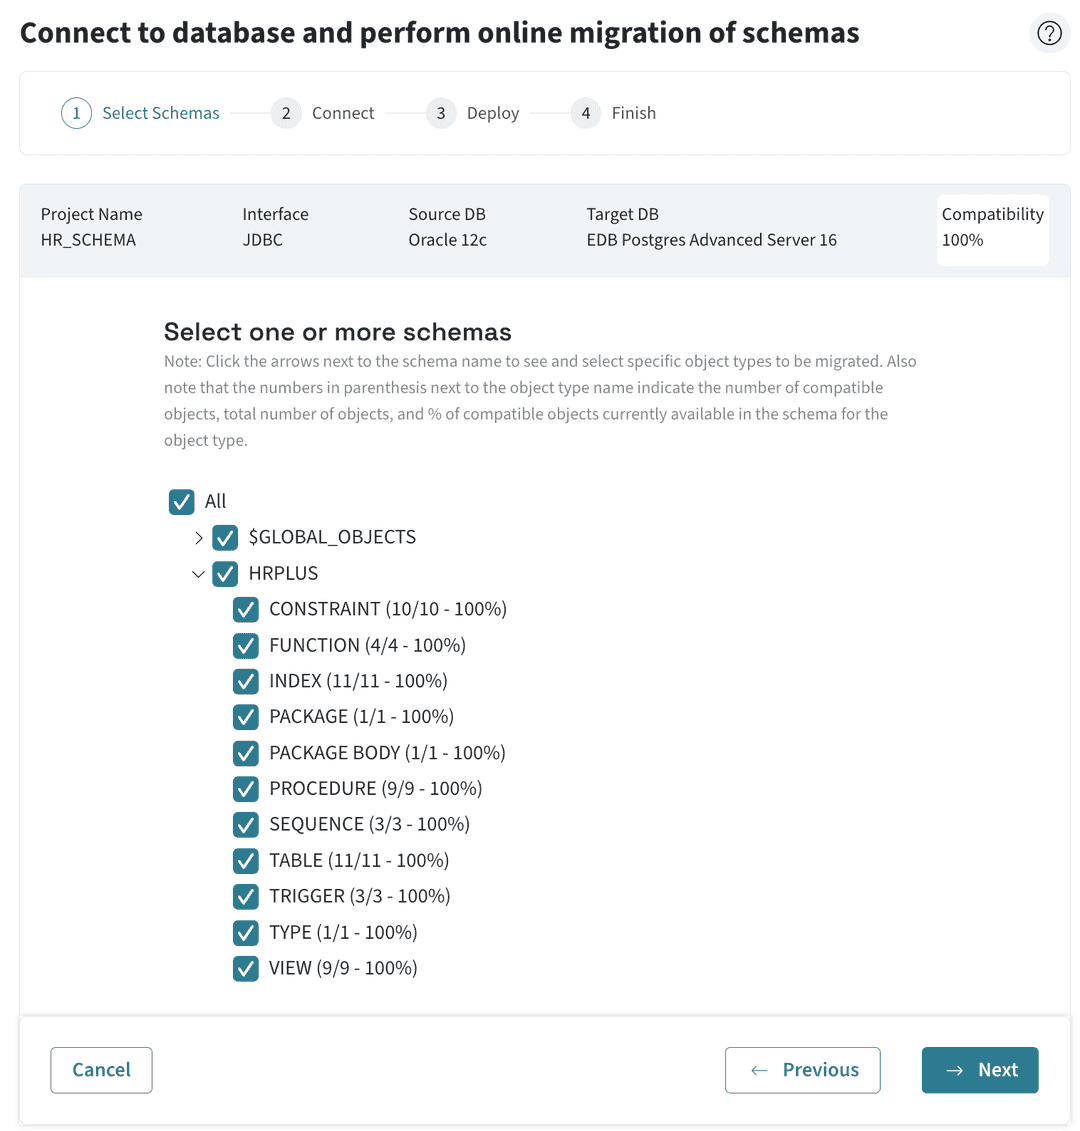
Select one or more schemas to migrate to EDB Postgres Advanced Server. You can also expand a schema and select specific object types under each schema.

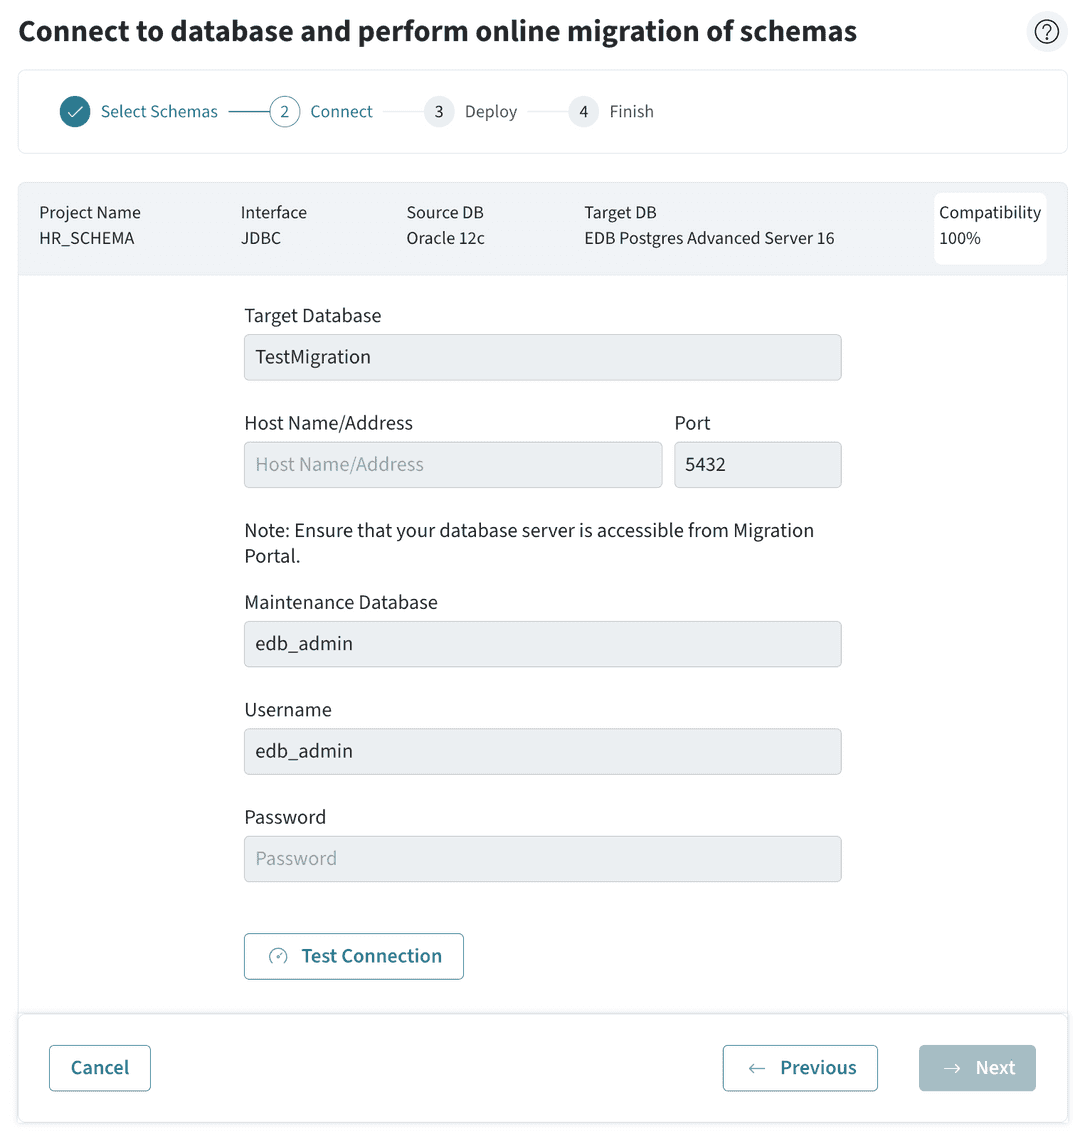
Enter the required connection details on the
Connectionpage.
To verify the connection details, select Test Connection.
Note
You can select Edit Connection to make changes to the connection details and retest the connection details.
If the test connection is successful, select Next to connect to the target database and create the selected schemas in the target server.
After the migration completes, a page displays with a message indicating whether the migration completed successfully or with errors. Select the Download Summary button to download and review a log generated for the migration attempt.
Select Done to return to the main Migration Portal page.
- On this page
- Offline migration
- Online migration